
I’m aware that “designer-tize” isn’t exactly the traditional ‘D’ in DIY (or even a real word…), but I felt that it was a much more appropriate label for my recent fall fashion makeover project!
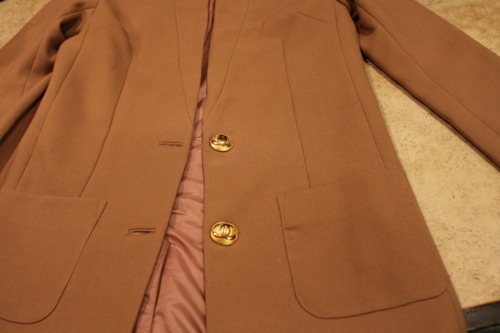
I recently purchased an amazing camel blazer from the new H&M at Northpark (see this blog entry) for the amazing price of $29.95. This is it, as-is:

Pretty cute, huh?
Needless to say, I cried real tears while standing on the plush red carpet outside H&M as I patiently awaited the moment the security guard would lift the velvet rope, allowing me to burst through the doors and snag something from the store on its inaugural day in Dallas.
But as much as I loved my purchase (not to mention the price of my purchase), I was tormented by a truth I couldn’t escape: the buttons looked cheap. Which is probably because the buttons are cheap, but whatever. You get what you pay for, right?
Wrong. Because in designer-tize it yourself land, we take things from off-the-rack to off-the-chain.
Here is where these guys come in:
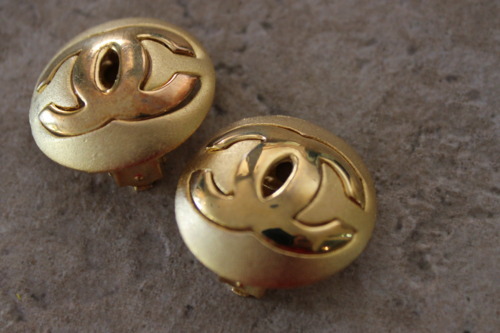
Chanel. Earrings. This is why I love thrifting so much. I mean, technically I’m not a “real” thrifter, like the kind that’s always finding this amazing scarf, or that amazing vintage handbag at some hole-in-the-wall that would give most of us an an asthma attack if we spent too long digging through the dust for buried treasures. But there were a few shops off Wilshire that I liked to explore with a latte in hand after leaving the US Weekly office in LA. Which is where I stumbled upon those wonderful, antique Chanel beauties, which the owner told me (in broken English) he had acquired from an estate sale. Meaning I probably inherited them from a rich grandma in Beverly Hills, which I try not to be creeped out by. (*Sidenote: see this blog post for more finds from the shop + old US Weekly stories.)
Anyway, despite the fact that they’re Chanel, the earrings are a little, well, grandma-ish. I mean, they’re clip-ons. But still—I was dying to wear them! Unfortunately, I’m not enough of a fashion maven to rock the granny-chic look thing, so wearing them in the traditional way was out. DING DING DING! Cue the flashing lightbulbs that went off telling me to turn them into buttons.
With the help of pliers…
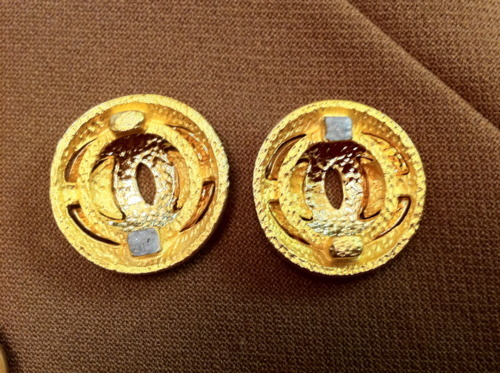
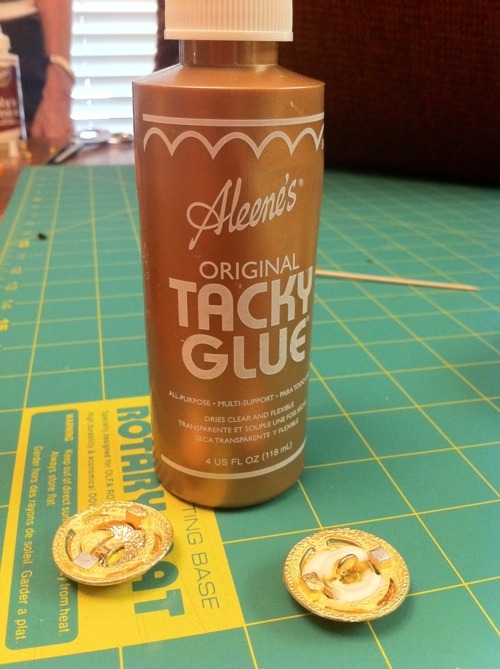
…and some tacky glue…
I was able to do just that! If you want to try something similar, the process couldn’t be easier.
Here’s how I did it:
1. Use a pair of hand-held pliers to pry off the clip on back (or the post of a regular earring).
2. Find a button in a coordinating color that will fit inside the back of the earring, and secure it to the earring with tacky glue. Allow to dry for at least 4 hours.
3. Remove the buttons on your blazer/jacket/vest/etc with a seam ripper and/or scissors. Whatever it takes to get the stubborn things off.
4. Sew your newly created button onto your blazer/jacket/vest etc by hand, starting your stitch from the front of the garment so that the knot in the thread will be hidden by your button (and not visible if your jacket blows upon on a breezy day/when you’re walking down the runway during NY Fashion Week).
5. Rock it, girl!
Before:
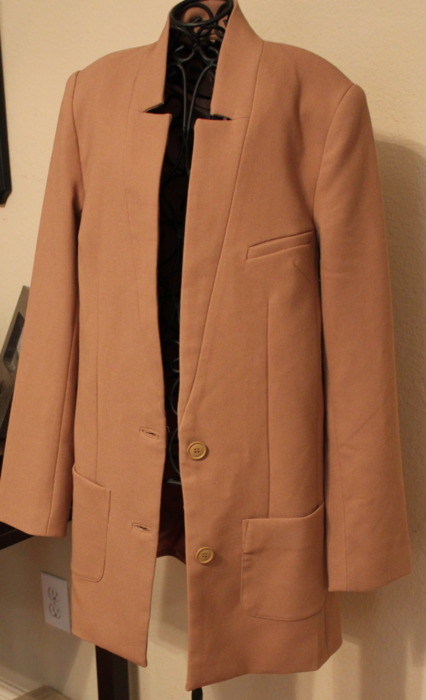

After:
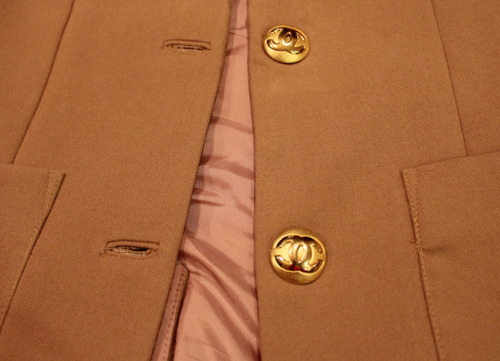
CLASSY, baby. Seriously, this project took no time at all. And now I’ll be able to trick everyone into thinking I bought a Chanel jacket! Maybe. If they’re not familiar with the style, look, quality, or fit of couture…which I am totally banking on, 100%.
Have you ever designer-tized anything? Have any other great suggestions for spicing up your fall wardrobe on a budget? Let me know. I’m always up for craft time!
xo

No comments
Post a Comment